The {Stamps} of Life has two really cute Christmas sets out this month - the club set is Holly4Christmas and the special release set is Christmas2Build. I made the following projects with these two sets.

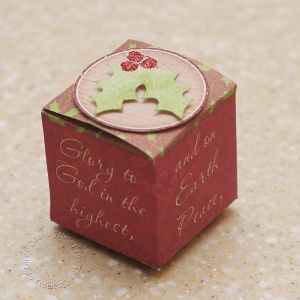
The holly on top was created with the digital brushes and then printed out along with the project itself, which uses Kelleigh Ratzlaff's Perfect Square box template and Kristin Cronin-Barrow's Holly Jolly digital scrapbook kit. I embellished the holly berries using PK Glitz China Red glitter and I love the extra touch it adds.

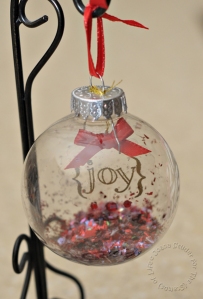
I also created this ornament. I used gold Color Box pigment ink to stamp "{joy}" onto acetate, then I dumped gold embossing powder on top of it. It took a long time to emboss it because I was worried about melting the acetate, even though it was the heat resistant kind made to run through copiers. I cut the acetate using a scalloped circle Nestabilities die, then I punched a hole using a large papercrafting needle and strung gold DMC embroidery floss through it. I added the sparkly confetti (which I've had for years, it was made by Magic Scraps and I don't believe they're still in business) using a funnel. I rolled up the acetate circle just tight enough to slip through the opening of the ornament. It unrolls after it goes through the opening. I threaded the floss through the lid of the ornament and then replaced the lid. I added the bow on top and then spent more time trying to get a good photo of it than I did actually creating it! I love how it turned out and I can't wait to see how it looks shimmering in the lights of our Christmas tree. I was so excited to find acrylic ornaments - I love the glass ones but I have two small children and there was no way I was going to make an ornament like this that could be easily broken.

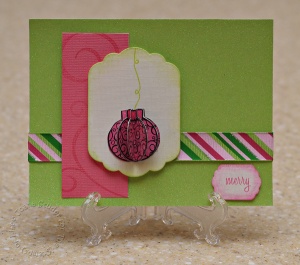
This card is so much more stunning in person - the green base paper is glitter paper by DCWV. I found a package of green and pink ribbons and thought it would be fun to create a Christmas card in non-traditional colors. I stamped the ornament five times and then cut out each ornament. I scored them in half and then stuck them together with adhesive to get the 3-d effect. I used the Swirls2Build to create the pink paper, and used the "merry" sentiment from last year's Joy2Christmas set. The dies are Nestabilities - same die shape, different sizes. Yes, I think I might be slightly addicted.

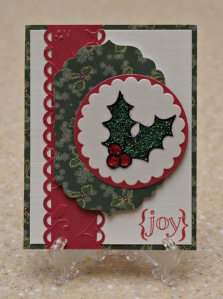
And last but DEFINITELY not least from the Holly4Christmas set is this card. It's hard to tell, but I used a stained glass technique to create the holly. I stamped the holly image onto acetate using CTMH black ink. I left it to dry overnight and it was fine in the morning. Then I added PK Glitz glitter in the green and red and placed a white piece of cardstock down on top, applying the adhesive to where the glitter is so you can't see it. Then I ran both pieces through my die cut machine with the scalloped circle Nestabilities die and cut the basic circle in the next size up to create a mat for the scalloped circle. I cut the green shape with a labels die. I embossed the red paper with a Cuttlebug bird embossing folder, then I cut a strip and punched it with a Fiskars open scallop border punch. Finally, I stamped "{joy}" in red and assembled the card. This one is my favorite so far!
I'll be back soon with some more creations from this month's stamp set!

No comments:
Post a Comment